Sunday, May 30, 2010

Spring Planting

All is done.  The Mankato Golf Club pots are out, the annuals planted and the retaining wall full of shrubs.  The veggie garden I did in Nicollet is complete with toms, cucs, carrots, lettuce, green onions, onions, radishes, jalapeños, and green peppers.  At our home, the pots and window boxes are done, the veggie garden complete and a few annuals dropped into the perennials for constant color. What did I plant?  Pots of coleus, million bells, the new sweet potato vine, and the window boxes are my favorite with a sample of some special plants.
Here's what's in these window boxes that sit out my kitchen window.
Verbena, Superbena Dark Blue
Petunia, Glow Forest Fire
Angelonia, Angelface Blue
Cuphea llavea, Totally Tempted
Osteospermim, Orange Symphony
Heliotrope, Blue
Phygelius hybrid, Red Alert Cape Fuchia
The last one is my favorite.  A few days after planting a hummingbird flew in for some nectar from it while I was washing dishes.
In this one is Nicotiana, Saratoga Red
Sweet Potato Vine, Illusian Emerald Lace
Carex trifida, Rekohu Sunrise
Vinca Vine
Coleus


A mix of Coleus


Coleus, Snazzy


Coleus, Splish Splash
Calibrachoa hybrid, Superbells Red
Petunia hyprid Surfina Lime

More pictures on the golf club plantings to come.  We'll wait until they fill in some.


Sunday, February 28, 2010

Composting

Did you know 26 percent of U.S. garbage is from yard trimmings and food residuals?  This equals 32 million tons a year!!  Not to mention the hazardous chemical (methane) that is released from breaking down of the rotting compostable material.  The U.S. is responsible for 34 percent of all methane emissions making us one of the major contributors to global climate change.  Huge, right?!  And how silly that it's all because we throw so much food and yard scraps in the trash!  So why not throw those veggie and fruit scraps in a pail, bring them out to the compost bin and let them turn into some good stuff for your garden?  


If you want to try something quicker, try worms.  I haven't tried these yet, but it looks interesting after you get over the "yuck- worms" feeling.  Here's a story of a lady in Mankato using little red wigglers.


I have a compost bin on the south side of our house (in the sun).  I keep all my trimmings from fruits, veggies, egg shells, coffee grounds (even the paper filter) in a pail under my sink.  Lidded is a necessity as it does get quite smelly when you open it if you haven't dumped in a few days.  In the summer, I dump it in the compost bin nearly daily.  Ideally, we'd water and turn it once weekly.  However we don't, so our composting takes a bit longer.  Below is some more reading on composting.  Besides composting, maybe we could all work harder to buy what we're going to eat.  Keep track of what we buy, so we know what we have to eat in the next couple of weeks.  I make a list of what meals we have to eat after getting home from the grocery store so it's there when I'm ready to start cooking.  


Happy composting!


The U of MN extension has recommendations for building your own compost structure here: http://www.extension.umn.edu/distribution/horticulture/DG5553.html

If you want to read up on composting, here are some blogs:


Also, here are a few of the many books about composting that are available:
"Backyard Composting: Your complete guide to recycling yard clippings" by Harmonious Technologies
"Let it rot! The Gardener's Guide to Composting" by Stu Campbell
"Rodale Guide to Composting" by Jerry Minnich and Marjorie Hunt
"Worms Eat My Garbage" by Mary Appelhof


Wednesday, February 3, 2010

Garden Girl

Wow, check out Garden Girl.  It's all about urban sustainable living.  I want that gig.  It's exactly what I'm into.  Learning about and trying new things and talking about it to help others. What's the newest thing you've tried in your garden and loved?  I love my rain barrels.  I can't believe my husband and I forgot about them until after it froze.  I'm really crossing my fingers and toes that they did't break.

Monday, January 25, 2010

Growing Vertical Veggies


Here in Minnesota, it's the dead of winter, but I hear people talking about planning for their gardens. We all know it's really cold, windy and snowy out there now, but give it a few months and we'll be getting our hands dirty in the gardens dreaming of our fresh vegetable crops.

 Here's an idea for this year: growing veggies vertically.   My mom did this a few years on the farm when she had her lasagna compost raised gardens.  Many of us who live in town have limited space for vegetable growing.  Why not grow those that'll grow out, up?  Maybe you already do snap peas and pole beans on a trellis, so why not grow winter squash, melons, cucumbers and zucchini on a trellis too?

The benefits?
increase usable space
increase dry time after rain
better air circulation reducing mildew and mold
greater access to sunlight
easy harvesting


What to use for a trellis?
You can build your own out of wood.  Be sure it's strong (wood & metal), tall (5+ feet) and well anchored (at least a foot into the ground).
You can also use a trellis, fence or A-frame.  Wide-mesh fencing, reinforced with additional support from iron rods or stakes, can also be used. 

There are also some ready made you can buy online or at your nursery:
Veggie Wall
A-Frame Support


Once you are ready to plant.  You can either put your trellis in the middle of your garden to plant on both sides.  Or put it along the north side of your garden and if it's a raised bed, you may utilize the extra support.

Plant your seeds in groups.  Peas together, squash together, etc. paying attention to the recommended distance to thin your seeds after they come up.  This will lead to healthy, full plants that produce more than cramped plants.

Water seeds as needed.  They may need to be watered in the morning and after supper to help them germinate.  If you wait for rain they will most likely get started a little later.  Hopefully there is plenty of sun to help them along in growing.

Once your plants are growing, guide them up the trellis by gently turning the vines through and around the supports.

Let it grow and water as needed.

Watch for buds to appear.  Let the bees come!

Watch for your harvest to ripen!  If some of your heavier veggies could use some support, put some old pantihose (not sure I even have any of them around and I can't even tell you how to spell it!!) around the squash/etc. tie it to the trellis until it's ripe. Then it won't fall of before it's ready.

Pick when they are ripe!  Yum, you have fresh veggies! Congrats!

Saturday, November 21, 2009

Relay for Life Event

Wow, what a great lunch event today for Relay for Life (such a great cause!).  There were so many creative tables, I was blown away.  I met many nice people and hopefully I inspired them to adorn their front steps with outdoor decor this winter.  


Winter 09- click here for more pictures


Here are some of the pots I brought to the demonstration along with other projects I've done.  Below is a summary of my presentation in case you need a reference or a little inspiration yourself!  I have some pots still for sale or I can replicate one for you if your favorite was sold.  I can also make one especially for you with you in mind.  Just email me!  gardencharm@blogspot.com


As winter approaches don't forget the front entrance as you decorate. Create an inviting, welcoming doorstep using some personal touches. But don't stop at a spruce top in a pot.  Add some willow or birch branches.  It's not important what you use, it's the intention and energy behind it.  
Try to capture the feeling of your home on the inside and out.  


First, if you wait until freezing weather, the greens don't dry out.  Start with an interesting container- don't use clay pots as they will crack in freeze-thaw pattern, you can use the same pots you used this summer. If the soil is frozen, bring it in to thaw for a few days or pour boiling water over the soil to thaw.
Meanwhile: think what you'd like to put in it: greens (check your local compost pile or your trees that may need a little trimming)


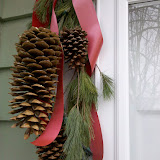
Think Thriller, spiller, filler (a pot doesn't need a lot of different materials to have big impact- see image of Simply Pine Cones).

Thrill the eye- dogwood twigs, prickly pinecones, bright berries, dried sliced oranges

Spill- let the elements hang over the edge to soften using norway pine, cedar, or juniper boughs
Fill in the box/pot. Think texture and color. rose hips, yellow-twig dogwood, hydrangea, crapapple branches, magnolia leaves, grasses, pine cones.

Pair heavy texture such as pine cones with finer
 texture such as cedar
Brows your garden for seed pods, sedum heads, colorful branches, - bring a child along to help they love collecting (don't we know it!)
            Add a personal touch- pheasant feathers, birdhouse, a special ribbon or bow,
Also think about giving it a little dressing for the holidays: add beads or ornaments (use shatterproof ornaments- wire them to branches).  After the holidays, take these out and continue to enjoy your creation for the remainder of the winter.

Now that your are prepared;

start with spruce tips
trim off bottoms
sink them into the dirt up to 6"
in window boxes, line them up in a zigzag pattern
Add lights
- winter being so dark, illuminate your pots by weaving them between the spruce tips before adding the other elements
add your thriller, filler & spiller.


Once you've finished, water your box/pot, the freezing of the water will hold the elements in place and if it warms, keep it watered.


Window boxes & pots are a great experimental playing field for creative minds. Challenge yourself to think outside the pot.

Now take your extra clippings and 
bring them inside to create a natural looking and fragrant centerpiece or bowl.


What other things can we use on our 
doorstep to make it welcoming and interesting?  Think of what you enjoy or what's around your home that can be outside for interest.
Sleds, lanterns, a pathway lit with luminaries (tin can & frozen), neatly stacked firewood, skates, metal stars, or anything that will withstand the elements.


Add these little touches for winter curb appeal to help make your front step welcoming to you, guests and passers-by. Check back for a tutorial of Iced Luminaries!


Wednesday, October 21, 2009

Holiday Work

Sorry, I haven't been a good garden charm blogger this summer. But do let me tell you what I'm working on. Holiday Front Doors! Doesn't everyone want to decorate your front door for the holidays and winter? I love it. As we grow wiser, we try to put up the Christmas lights before "winter" hits. We usually outline our roof with the classic C9 multi-colored strands. The past few years we put up garland and a wreath from the Boy Scouts. Then I'd dilly-dally with some grapevine & non-breakable ornaments. I throw greens in my window boxes and add some berries, ornaments, etc. Then I'll get out the wooden sleds and add a pot or two of spruce tips and greenery, some lights and a little of this and that.

It's Oct. 21st and the to-do list entails getting the Christmas Lights and outdoor decorations out of the attic. I have a presentation to give the week before Thanksgiving, so I'm ready to start on the display (pictures to come!). Here's what I have on my list for this year:
Big Metal Star
lanterns with chunky candles
basket with big ornaments
birdbath with berries
sleds
ice skates
old snow skies
battery operated candles on inside of window
brass bucket with Styrofoam balls sprayed with faux snow & birch branches

What do you traditionally decorate with outdoors in the winter?

Tuesday, June 9, 2009

Early June Bloomers- 2009

As I publish this post I wonder what time these perennials will bloom next year. With the cool spring we've had I believe everything is blooming a bit later. What are your thoughts?


Will my neighbors ever get to enjoy the peonies blooming outside? I love to cut them and enjoy them inside.


A rose is a rose... well, just because I'm not sure of the name of this dark pink shrub rose.


Ernest Markham Clematis- I made the mistake of not cutting this clematis back this Spring due to a tiny little bird nest I found in it. Now I've got an overgrown clematis! Hopefully the awesome flower show will be worth it!


Duchess of Edinburgh Clematis


La Bourboule Pinks (Dianthus) Did you know pinks get their name not because they are pink but because of the jagged edge of the flower looks as though it's been cut with a pinking sheers!?


Blue dogbane is an excellent choice for a shrubby, native perennial. It will thrive in full to partial sun, growing up to 3 feet tall. It blooms beautiful light blue flower heads in early summer. It is hardy to Zone 3.

Siberian Iris

Red Maiden Pinks (Dianthus)

About Me

My photo
Raised on a farm in MN, taught our future, now at home with the kids. Life is good!